
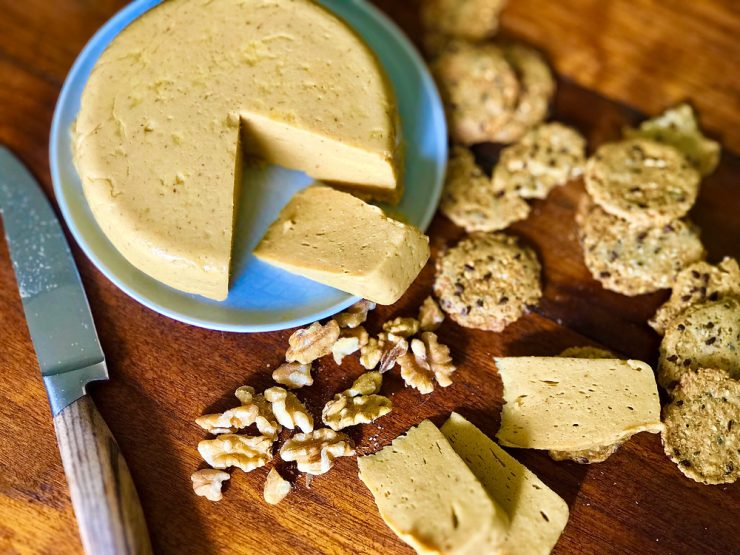
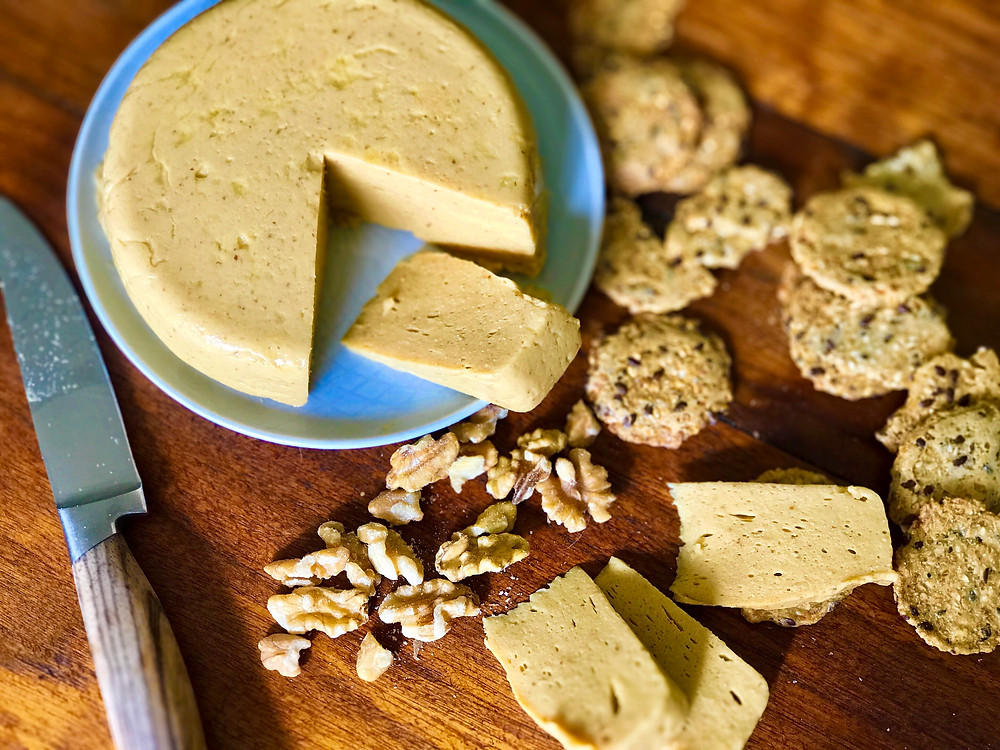
Who says you need dairy to enjoy rich, tangy cheddar cheese? This Cultured Oat Cheddar Cheese is a game-changer for vegans, lactose-intolerant folks, or anyone who loves a good kitchen experiment. Creamy, sliceable, and packed with umami flavor, this cheese alternative is surprisingly easy to make. The first time I served it at a party, my dairy-loving friends couldn’t believe it was oat-based! Let’s turn humble oats into a block of golden, melty goodness.
1. How to Make Cultured Oat Cheddar Cheese
If you’ve ever wanted to impress your friends with homemade vegan cheese that actually tastes like the real deal, this Cultured Oat Cheddar Cheese is your golden ticket. The secret? A fermentation step that gives it that classic cheddar tang. Don’t worry—no fancy equipment needed, just a blender, a cheesecloth, and a little patience.
1.1 Ingredients:
- 2 cups rolled oats (gluten-free if needed) – The creamy base
- 1/4 cup nutritional yeast – For that cheesy, umami punch
- 2 tbsp tapioca starch – Helps with meltability
- 1 tbsp apple cider vinegar – Adds tanginess
- 1 tsp white miso paste – Deepens flavor complexity
- 1/2 tsp garlic powder – Because cheese needs garlic
- 1/2 tsp onion powder – Extra savory notes
- 1/2 tsp turmeric (for color) – Optional but makes it look legit
- 1 probiotic capsule (or 1/4 cup vegan yogurt) – The culturing agent
- 1 tsp salt – Balances flavors
1.2 Instructions:
- Blend the Base: Soak oats in 3 cups of water for 2 hours, then blend until ultra-smooth. Strain through a nut milk bag to remove grit.
- Ferment the Magic: Whisk in probiotic powder (or yogurt) and let sit at room temp for 12-24 hours. It should smell slightly tangy—like yogurt.
- Cook & Thicken: Transfer to a pot, add remaining ingredients, and stir over medium heat until thick (like nacho cheese).
- Set & Slice: Pour into a lined mold, refrigerate 4+ hours, then unmold and enjoy!
2. Tips for the Perfect Dish
Making vegan cheese can be tricky, but these pro tips ensure success:
- Strain Twice for Smoothness: After blending, strain the oat milk through a fine sieve AND a nut milk bag. No one likes gritty cheese!
- Fermentation Matters: If your kitchen is cold, let it culture longer (up to 36 hours). Bubbles = good bacteria at work!
- Slice It Cold: This cheese firms up when chilled. For clean cuts, use a hot knife (run under hot water first).
- Flavor Boost: Add 1/2 tsp smoked paprika for a “sharp cheddar” vibe.
- Storage Smarts: Keeps for 2 weeks in the fridge, or freeze for 3 months (thaw slowly to avoid texture changes).
3. What to Serve With
This Cultured Oat Cheddar Cheese isn’t just for snacking—it’s a versatile star!
- Vegan Charcuterie Board: Pair with crackers, grapes, and spiced nuts. Fancy and plant-based!
- Grilled Cheese Sandwich: Melts beautifully on sourdough with tomato soup.
- Mac & Cheese Sauce: Thin with plant milk for a creamy pasta sauce.
- Cheese & Crackers: Simple, classic, always a hit.
- Stuffed Jalapeños: Fill peppers, bake until bubbly. Spicy + cheesy = perfection.
4. Ingredient Substitutes
Out of something? No stress—here’s how to adapt:
4.1 Substitutes for Rolled Oats
Quinoa or Cashews
- Quinoa: Cooked and blended, it’s neutral-flavored and protein-rich.
- Cashews: Soak overnight, blend creamy. Richer, but pricier.
4.2 Substitutes for Tapioca Starch
Arrowroot or Cornstarch
- Arrowroot: Same thickening power, neutral taste.
- Cornstarch: Works in a pinch but can make cheese slightly gummy.
5. Final Thoughts
This Cultured Oat Cheddar Cheese proves plant-based eating doesn’t mean sacrificing flavor. It’s creamy, sliceable, and downright delicious—give it a try!
6. Important Data
- Serves: 8
- Prep Time: 15 mins (+ fermentation)
- Cook Time: 10 mins
- Calories/Serving: 120 kcal
- Fat/Serving: 3g
Also Read:


“If you add your rejuvelac to hot oats, you will kill your precious probiotics!”
So even though you aknowledge this, you then proceed to boil all of it once it is done culturing. Seems pointless: why don’t you just add the rejuvelac to the container in which you keep the solid product? This also removes a couple pointless steps, minimizing the amount of work and cleaning as well as prolonging the shelf life, provided you keep the lid barely open so that the thing breathes but doesn’t spoil.
Thanks for the recipe. How long can this be stored in the fridge?